Microsoft Excel allows the user to create and design tables according to the needs. This module deals with this and following is a list of topics you will learn from this.
- Inserting a Table
- Designing a Table
- Filtering
- Expanding a Table
What is a Table?
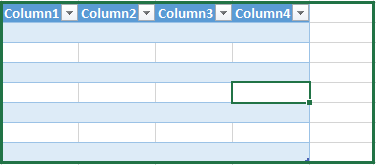
A table is a collection of rows and columns which meet to form cells. In MS Excel, a user can create tables to deal with data exclusively, without disturbing the data outside of it.
Inserting a Table
Ritika has to make a table in her spreadsheet for a project at school. She follows these steps to make one.
To insert a table,
- Select the range of cells that you want to have a table in.
- Click on the ‘Insert’ menu and select ‘Table’.
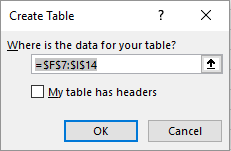
- Your selection of cells will be shown in the ‘Where is your data for the table’ textbox.
- Select the ‘My table has headers’ textbox.
- Click ‘Ok’.
Designing a Table
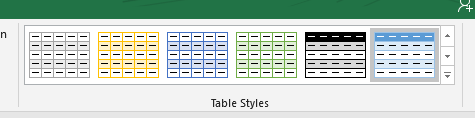
Once Ritika has created the table, the ‘Design’ tab opens on the top of her screen. She has various options to customize her table. Some of them are:
- Colour and Appearance: She can change the way her table looks by selecting a theme from the various options given in the top right corner of the ribbon under ‘Table Styles’.
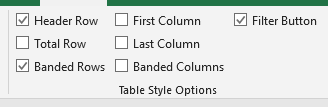
- Table Style Options: She can choose to keep or not keep certain rows or columns by checking or unchecking the boxes respectively in the ‘Table Style Options’ group.
- Naming: She can give her table a name by entering suitable text in the ‘Table Name’ textbox to the left top corner of your screen.
- Resizing: She can resize the table by going to the ‘Resize Table’ option below the ‘Table Name’ textbox and entering the new range of cells she wants her table to be in.

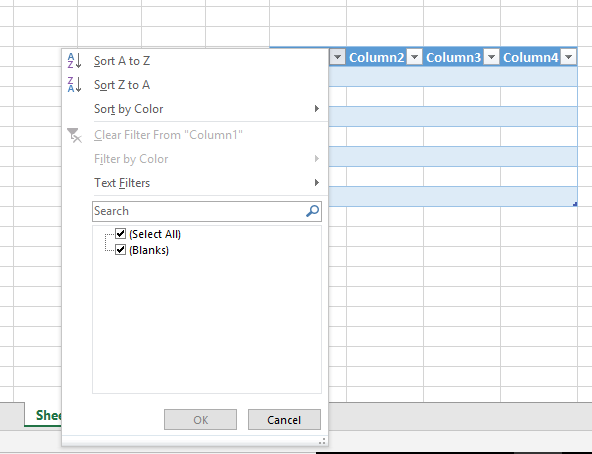
Filtering
She can filter the data exactly the same way she did using the ‘AutoFIlter’ option, by clicking on the small dropdown arrows of each header and using the necessary ‘Text filters’.
Expanding a Table
To expand her table, use the small triangle at the right bottom corner of her table and drag it to include the cells she wants to be part of her table.