Daya has inserted a picture in her Excel Sheet. She wants to bring some corrections to it to make it look more synchronized with the sheet. These are the options available to her:
- Sharpen/Soften
- Brightness/Contrast
Sharpen/Soften
Sharpening an image increases the detailing and specifications of it to more clarity. Softening an image, on the contrary, decreases these and the image appears more blurred.
To sharpen/soften an image, Daya should select her picture, go to the ‘Format’ tab under the ‘Picture Tools’ menu and click on the ‘Corrections’ dropdown list in the ‘Adjust’ group. This can be found towards the left side of the ribbon. The following dropdown list will appear.
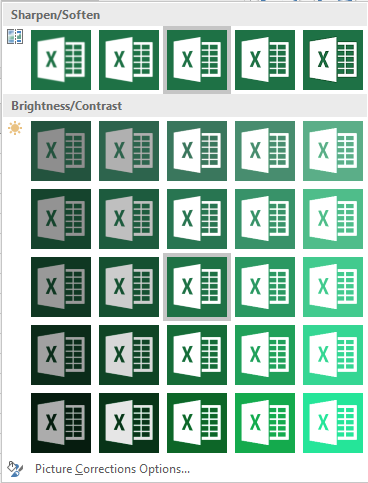
She can either choose a version from this, under the ‘Sharpen/Soften’ heading or customize it by clicking on the ‘Picture Corrections Option’. This will display the ‘Format Picture’ pane on the right side of the screen.
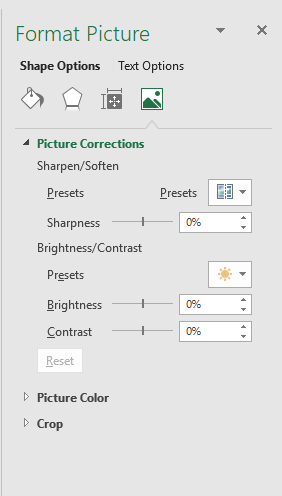
Under the ‘Sharpen/Soften’ heading here she has two options: ‘Preset’ and the Sharpness bar.
The ‘Preset’ option will show her the sharpness settings that are already available and is similar to the ones present in the dropdown list.
In the Sharpness bar, she can manually adjust the sharpness. It is, b default, set at 0 %. Going to the left will increase the softness and to the right will increase the sharpness.
Brightness/Contrast
Brightness of an image increases the lighting of it. Contrast is the difference in colours of an image. Increasing the brightness will increase the luminance of the image while increasing its contrast will make its colours more prominent.
To change the brightness/contrast of an image, Daya should select her picture, go to the ‘Format’ tab under the ‘Picture Tools’ menu and click on the ‘Corrections’ dropdown list in the ‘Adjust’ group. This can be found towards the left side of the ribbon. A dropdown list will appear. She can either choose a version from this, under the ‘Brightness/Contrast’ heading or customize it by clicking on the ‘Picture Corrections Option’. This will display the ‘Format Picture’ pane on the right side of the screen.
Under the ‘Brightness/Contrast’ heading here she has three options: ‘Preset’, the Brightness and Contrast bars.
The ‘Preset’ option will show her the brightness/contrast settings that are already available and is similar to the ones present in the dropdown list.
In the Brightness bar, she can manually adjust the brightness. It is, by default, set at 0 %. Going to the left will increase the brightness and to the right will decrease it.
In the Contrast bar, she can manually adjust the contrast. It is, by default, set at 0 %. Going to the left will increase the contrast and to the right will decrease it.