Minnal has inserted some amazing shapes and SmartArt on her sheet but now she finds that they overlap each other and are not properly visible. In such a situation, it is necessary for arranging graphics these properly. Sonia told her that this can be done using various options as follows:
- Bring Forward
- Send Backward
- Selection Pane
- Align

Arranging Graphics-Bring Forward
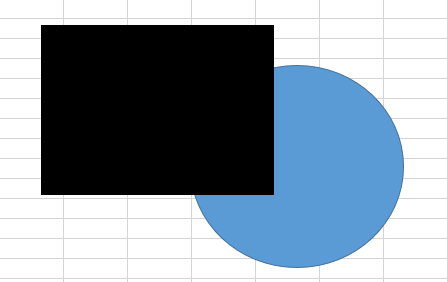
She can bring a graphic forward by selecting it and then going to the ‘Arrange’ group in the ‘Page Layout’ menu. She can now click on the ‘Bring Forward’ option to move the graphic to the front.
Bring Forward and Bring to Front: ‘Bring Forward’ option should be used when she selects a graphic that is in the back and she would like to bring it to the front of the graphic immediately after that. ‘Bring to the Front’ should be used when she wants to bring the graphic to the front of all other graphics.
Arranging Graphics-Send Backward
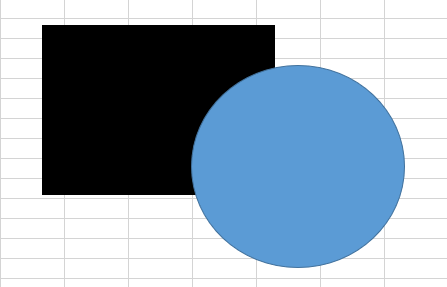
She can move a graphic backward by selecting it and then going to the ‘Arrange’ group in the ‘Page Layout’ menu. She can now click on the ‘Send Backward’ option to move the graphic to the back.
Bring Backward and Bring to Back: ‘Bring Backward’ option should be used when she selects a graphic that is in the front and she would like to bring it to the back of the graphic immediately before that. ‘Bring to the Back’ should be used when she wants to bring the graphic to the front of all other graphics.
Arranging Graphics-Selection Pane
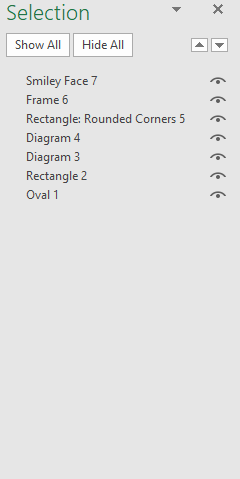
She can also choose to arrange these manually by clicking on the ‘Selection pane’ option in the ‘Arrange’ group in the ‘Page Layout’ menu. A pane will be displayed on the right-hand side of the screen showing her a list of various graphic she has inserted.
Arranging Graphics-Align
She has various options in the ‘Align’ dropdown list in the ‘Arrange’ group in the ‘Page Layout’ menu.
- Snap to Grid: Often when we move a graphic like a shape or a SmartArt, it moves in small pauses or jerks. This is because it moves on an underlying invisible grid, that encompasses the entire document. By selecting this option she can turn this option on.
- Snap to Shape: Instead of the Excel grid, the graphic will now snap/move to the nearest shape.
- View Gridlines: By default, this option remains selected. This means that the Excel gridlines are visible. In case she wants to turn this off during her alignment, she can choose to do so by deselecting this option.