We will continue to build our blog app where we left in the post writing-your-first-blog-app-in-django-part-7.
So in this post we will continue to see that how to add a particular link to each article such that when user click user clicks on that particular url it will open the full details about that particular article.
So first open up the articles/urls.py file and add a url that goes to a particular url as following:
from django.urls import path
from django.conf.urls import include,url
from . import views

urlpatterns = [

  #path('',views.articles_list),
  #path('',views.article_detail),
  url(r'^$',views.articles_list),
  #a named capturing group
  #To create a named capturing group we have to say ?P
  #In angular brackets we have to write the name of the thing we want to capture
  #\w:any type of letter,underscore
  #^:start
  # $:end
  # - means: - can also be included in url
  # + means: that thing before it can be of any length
  url(r'^(?P<slug>[\w-]+)/$',views.articles_details),
]
Now after that add the articles_details function in views.py file as following:
from django.shortcuts import render
from .models import Article
from django.http import HttpResponse
'''
Takes in the request object.
All we are going to do in this function is we will render a template
     to the user which is going to show a list of articles.
First parameter in render is always the request object and the second parameter is
     the template we want to render and third optional is the directory
'''
def articles_list(request):
    #Retrieve all articles from database and sort them according to date
    articles = Article.objects.all().order_by('date')
    return render(request, 'articles/articles_list.html',{'articles':articles})

def articles_details(request, slug):
    return HttpResponse(slug)
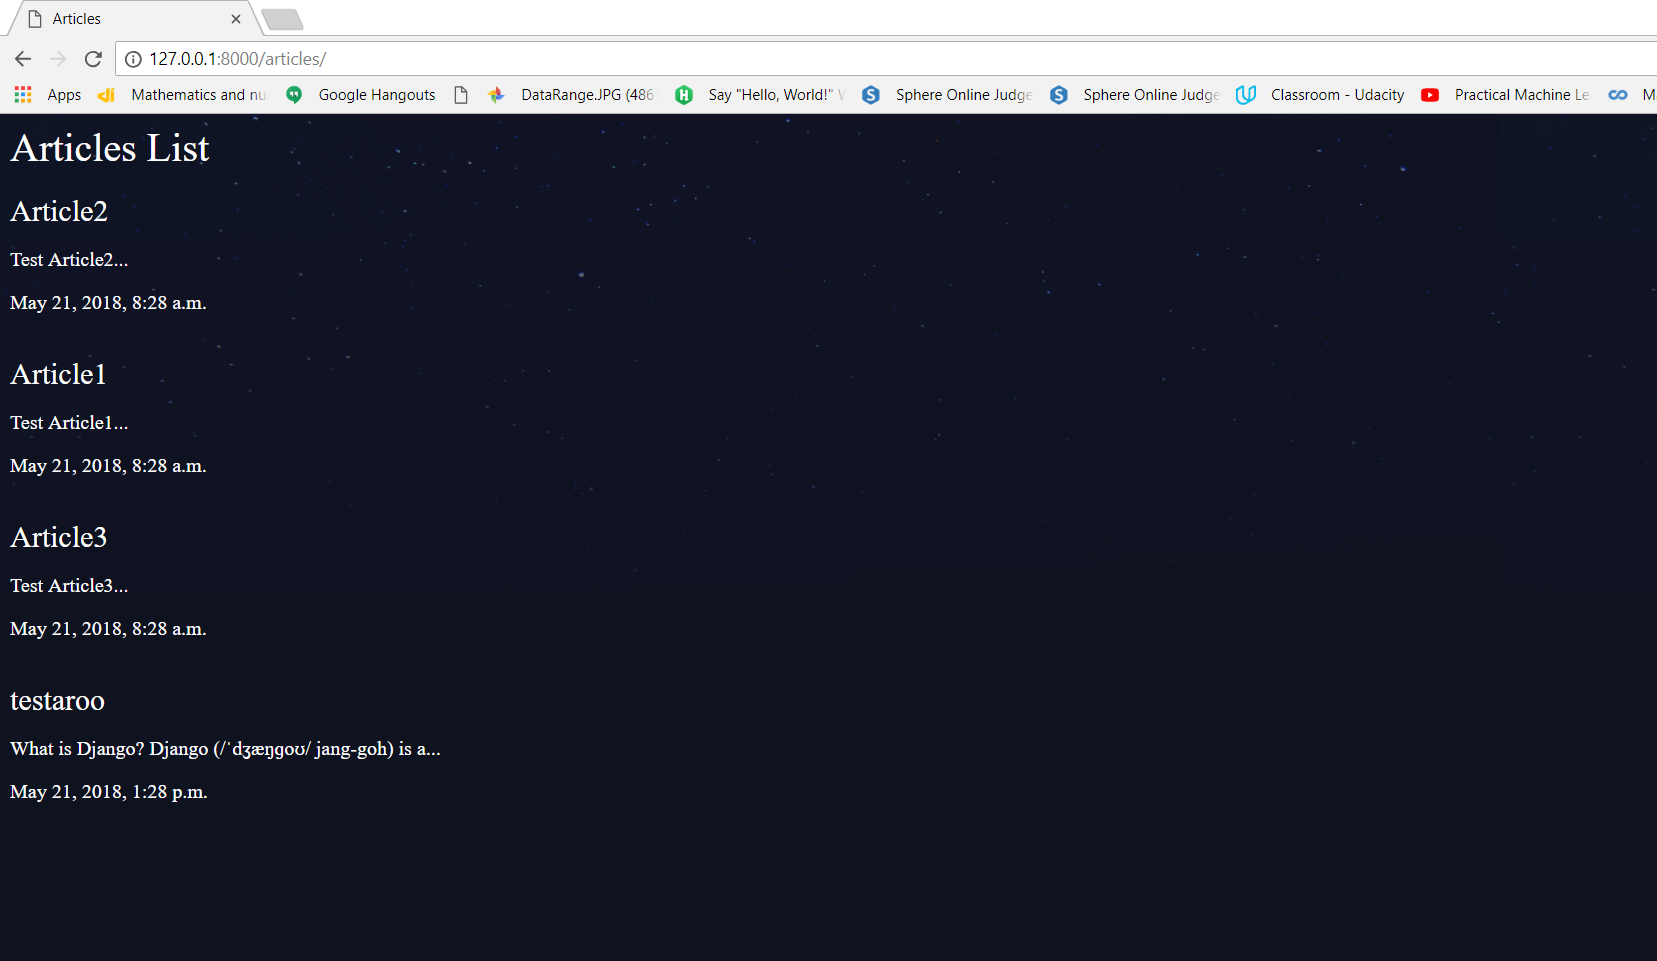
Now after doing this changes run the server by typing python manage.py runserver.
You will be shown this screen:
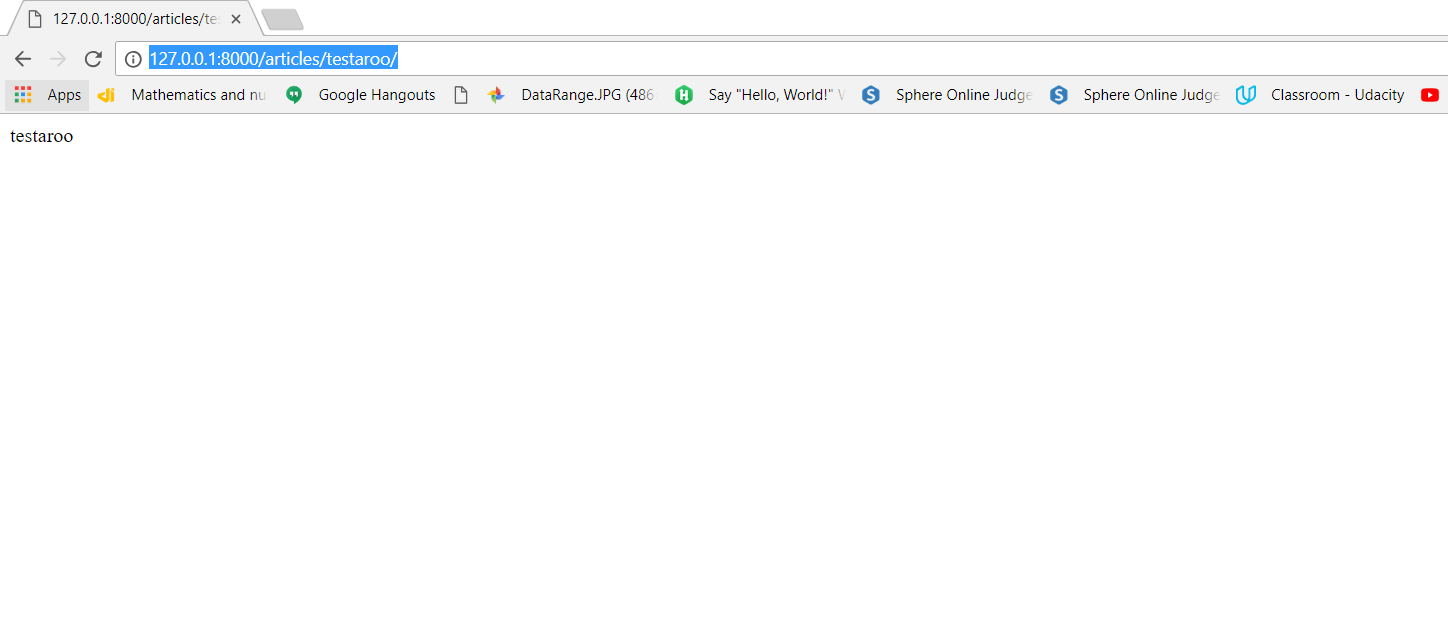
Now suppose you want to go to full testaroo[which have slug as testaroo only].So at the end you can add that slug/.It will open that full article.Now go to http://127.0.0.1:8000/articles/testaroo/,it will open this.So now we have captured the url where we want to go.
Now to what we can do is take that slug,query our database to look for an article which has that slug and if it does then we will retrieve that article send back a template with that article so the user can see it.
Now we will see how to use named URL’s concepts in our app.So to do that first change the articles/urls.py file as follwing:
from django.urls import path
from django.conf.urls import include,url
from . import views

app_name = 'articles'

urlpatterns = [

  #path('',views.articles_list),
  #path('',views.article_detail),
  url(r'^$',views.articles_list,name="list"),
  #a named capturing group
  #To create a named capturing group we have to say ?P
  #In angular brackets we have to write the name of the thing we want to capture
  #\w:any type of letter,underscore
  #^:start
  # $:end
  # - means: - can also be included in url
  # + means: that thing before it can be of any length
  url(r'^(?P<slug>[\w-]+)/$',views.articles_details,name="detail"),
]
After that change the base_layout.html file as following:
[Note:download the logo image from here https://raw.githubusercontent.com/iamshaunjp/django-playlist/lesson-15/djangonautic/assets/logo.png and save it in the assets folder.]
{% load static from staticfiles %}
<!DOCTYPE html>
<html>

<head>
    <meta charset="utf-8">
    <title>blog app</title>
    <link rel="stylesheet" href="{% static 'style.css' %}">
</head>

<body>
    <header class="wrapper">
        <h1>
            <a href="{% url 'articles:list' %}"><img src="{% static 'logo.png' %}" alt="djangonautic" /></a>
        </h1>
    </header>
    <br>
    <div class="wrapper">
        {% block content %} {% endblock %}
    </div>
</body>

</html>
After that at the last change the articles_list.html file as following:
{% extends 'base_layout.html' %} {% block content%}
<h1>Articles List</h1>
<br>
<br>
<div class="articles">
    {% for article in articles %}
    <div class="article">
        <h2><a href="{% url 'articles:detail' slug=article.slug %}">{{ article.title }}</a></h2>
        <p>{{ article.snippet }}</p>
        <p>{{ article.date }}</p>
    </div>
    <br> {% endfor %}
</div>
{% endblock %}
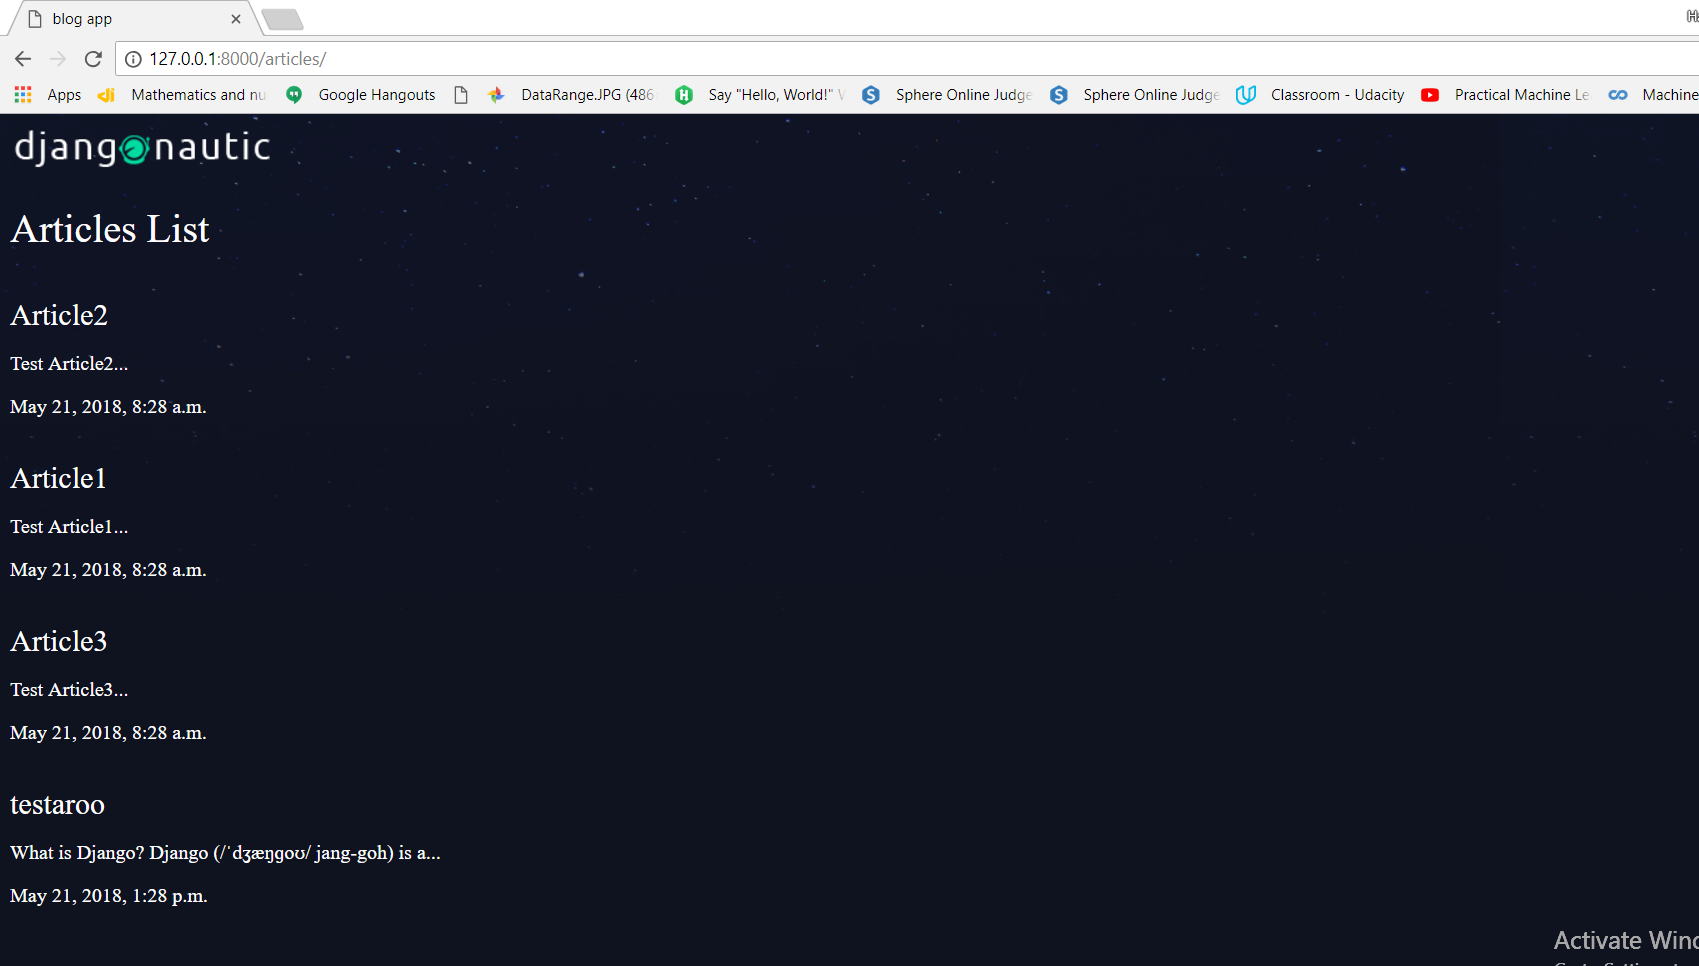
After this all changes when you run the server,you will see the screen as below and if you want to open particular article then you can click on the title of that article,it will open that particular article,but we did not see that articles’s body on that page.So we are succeed in going for a particular page for each article.Now our work is to show that article’s body on that page,that we will check in next post.
This is all about how to use concept of url parameters and named url’s in our blog app.