We will continue to build our blog app where we left in the post writing-your-first-blog-app-in-django-part-2
Now let’s change our blog app little bit to get clear url rendering.Change the main blog app’s url.py file as following:
from django.contrib import admin
from django.urls import path
from django.conf.urls import include,url

urlpatterns = [
    path('admin/', admin.site.urls),
    path('articles/', include('articles.urls')),

]
and articles app’s url.py will look like this:
from django.urls import path
from django.conf.urls import include,url
from . import views

urlpatterns = [
  path('',views.articles_list),
]
Now run the app by typing “python manage.py runserver” in command prompt and open the server,you will see the screen like this:
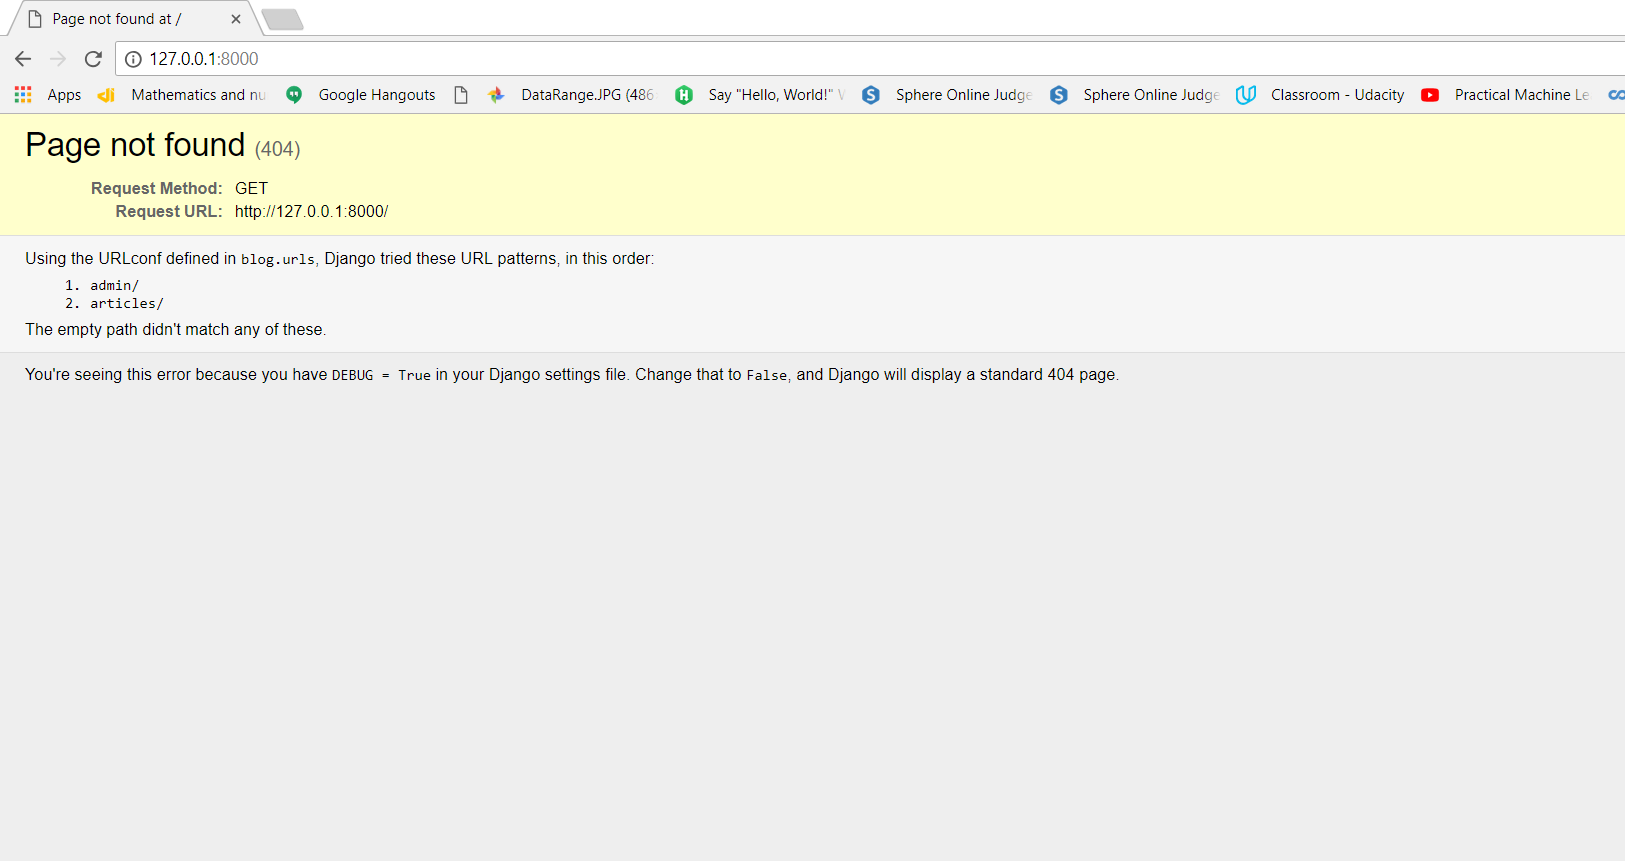
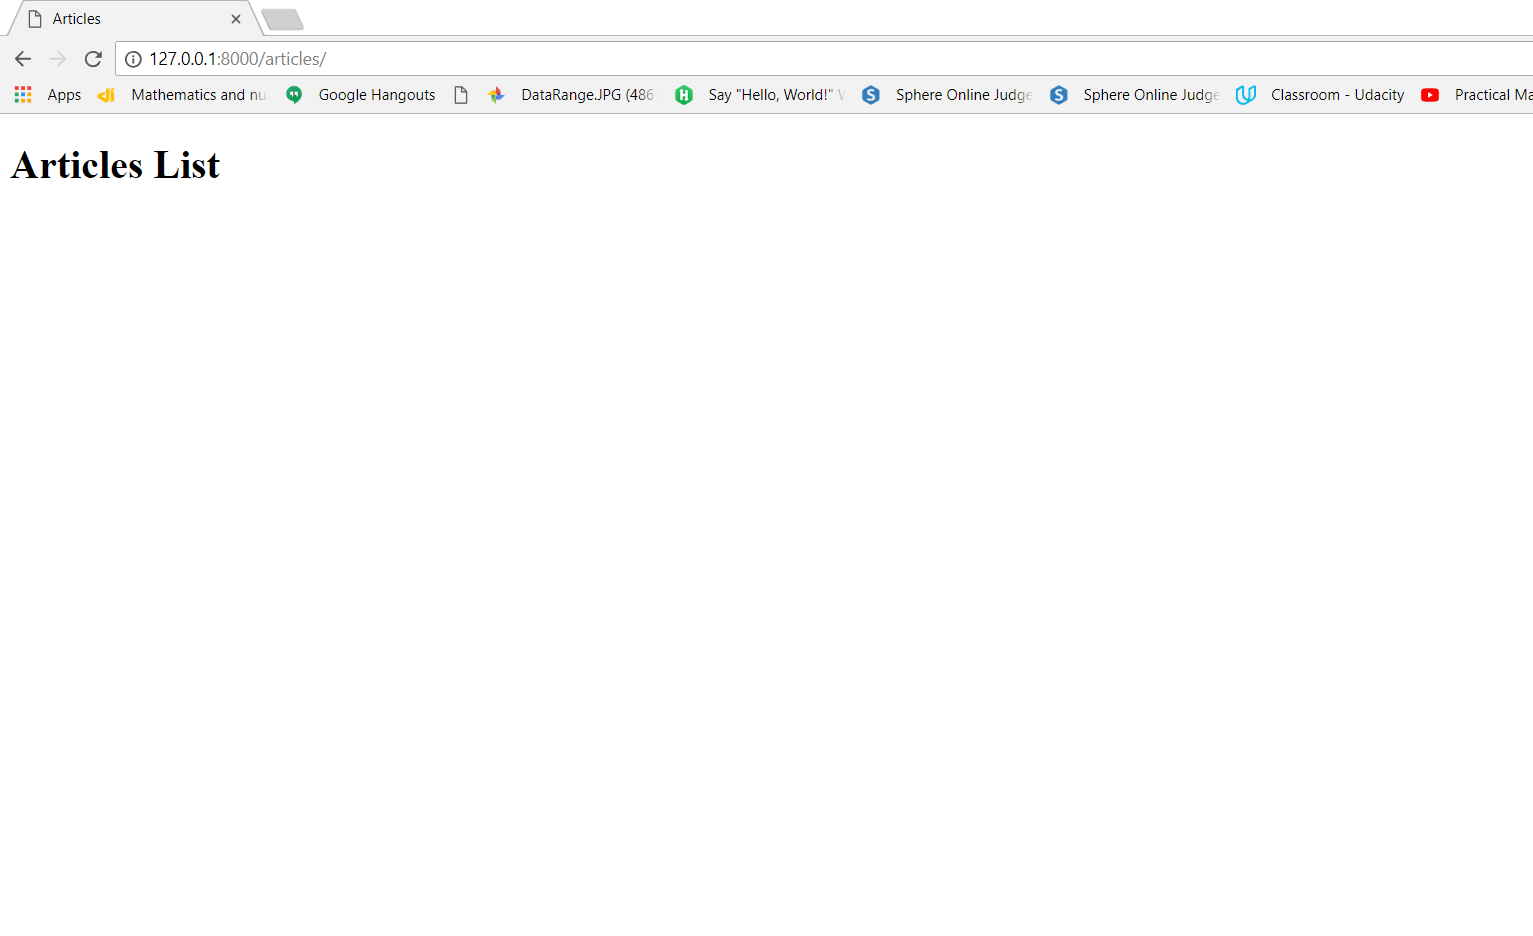
This is because in the main urls.py we don’t have url that opens the home page.Now write this articles/ at the end of url in web browser,,you will see the screen like this:
Create Models in our app
So far we have been messing around with URLs and views and we have been sending back templates to the user.However this are just static templates but what we really want to do is start working the data because after all blog is a collection of articles which in turn is a collection of data and that’s going to be stored in a database.So we want our views and templates to be a little bit more dynamic.
I hope you have read the concept of models in django from our post “Models In Django“.Now we will add models in our articles app.
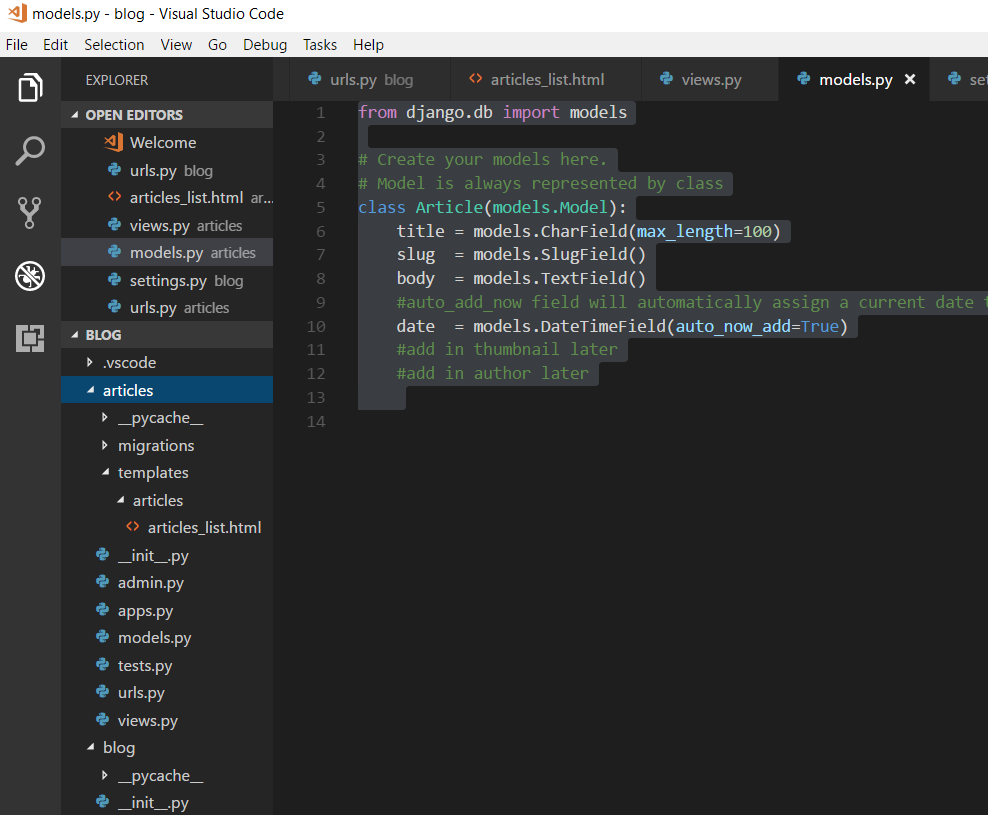
Create Article model in the articles/models.py file as following:
from django.db import models

# Create your models here.
# Model is always represented by class
class Article(models.Model):
    title = models.CharField(max_length=100)
    slug  = models.SlugField()
    body  = models.TextField()
    #auto_add_now field will automatically assign a current date to the post we create
    date  = models.DateTimeField(auto_now_add=True)
    #add in thumbnail later
    #add in author later
Applying migrations
Now we have model in our articles app,but our database doesn’t know about this model,it doesn’t know that we want to create Articles table in database and want to store articles in that table.So for this we have to migrate this model to database and then the database knows to create the articles table in database.So now we will take our model,make migration file then migrate that to database
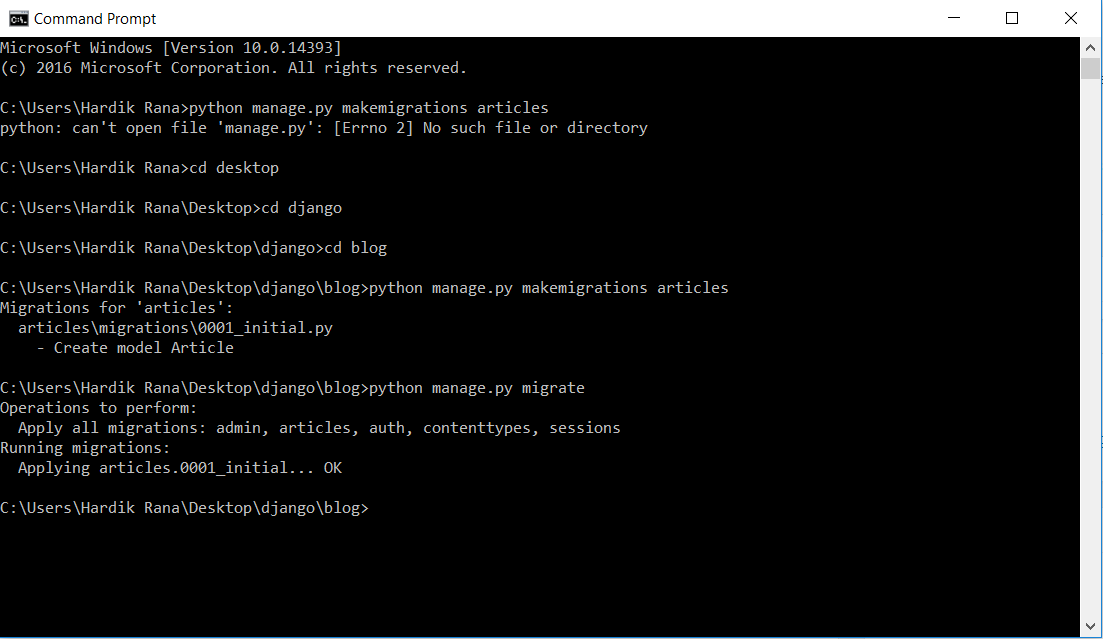
So for making migration file write this command “python manage.py makemigrations articles” in command prompt.
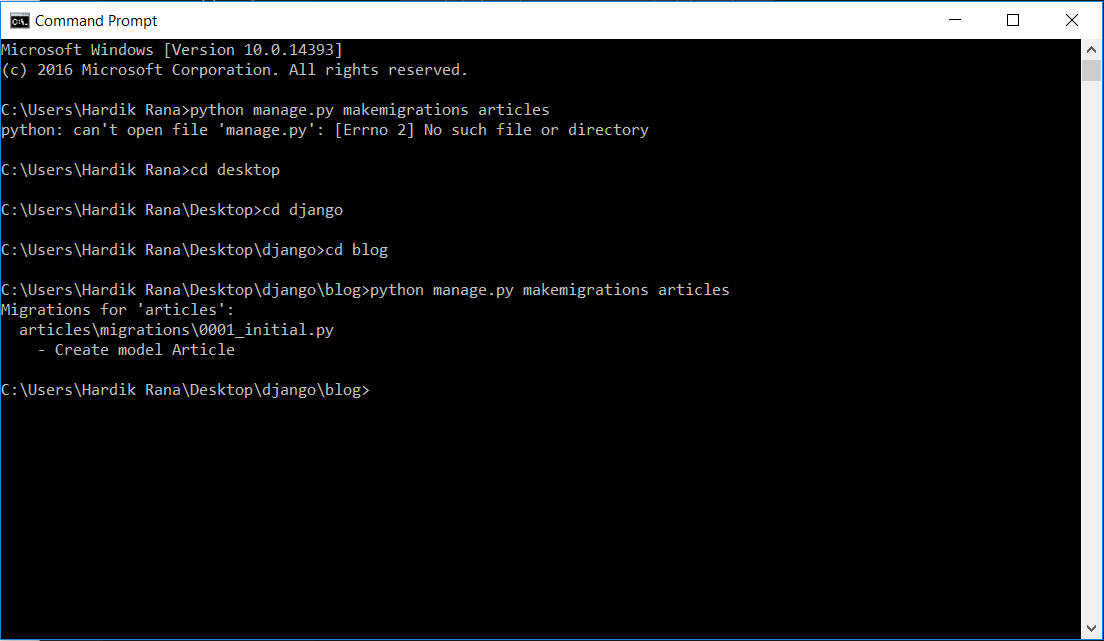
This will create migrations folder inside your articles app like this
To apply this migration file to database write “python manage.py migrate” in the command prompt:
ORM in our app
Now we want to interact with that database.For that we will use django ORM. Django ORM bridges the gap between the code and the database and it is built into django so that we can interact with database.
To interact with database open command prompt and type “python manage.py shell”.This will open a python shell in your command prompt.
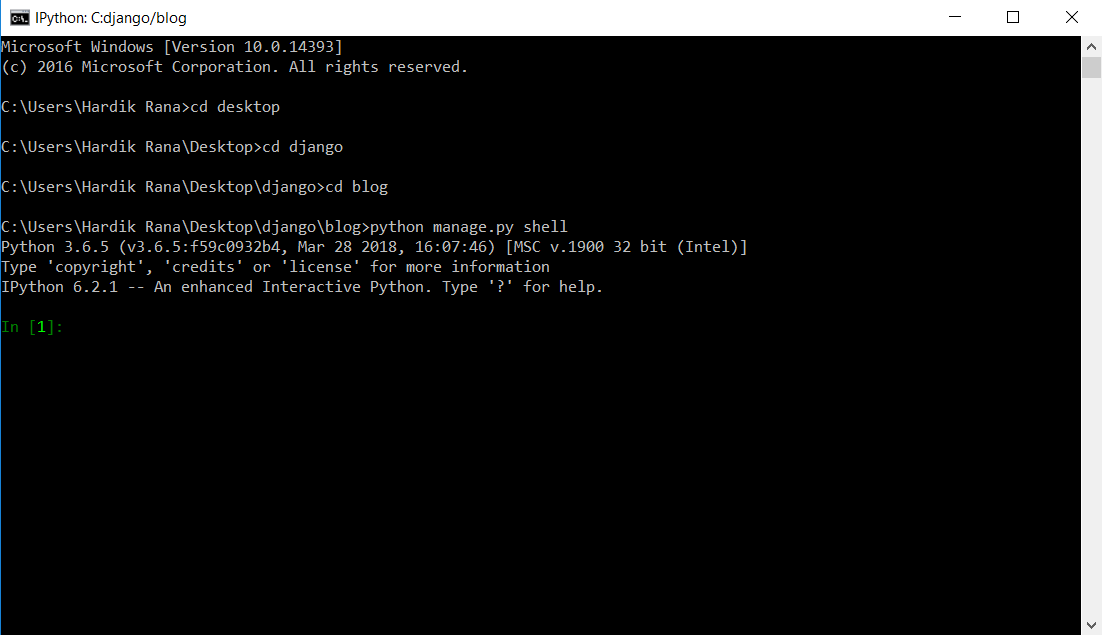
Now first import model by typing this command:from articles.model import Article.
So as mentioned in Django ORM and QuerySets post.We will add in a function called __str__ in models.py file,which is built-in function defining how an article is going to be look both in the admin section and in the shell when we just retrieved them.
So add a function in articles/models.py file as following:
from django.db import models

# Create your models here.
# Model is always represented by class
class Article(models.Model):
    title = models.CharField(max_length=100)
    slug  = models.SlugField()
    body  = models.TextField()
    #auto_add_now field will automatically assign a current date to the post we create
    date  = models.DateTimeField(auto_now_add=True)
    #add in thumbnail later
    #add in author later

    def __str__(self):
        return self.title
This is all about how to create model in our article app,how to make migration file and migrate it to database.