Hey guys , In this article i have shared the installation of JAVA eclipse IDE in the computer or Laptop for windows for the starting.
Complete Guide for the JAVA eclipse IDE Installation
- Go to the JAVA eclipse official website ” http://www.eclipse.org/downloads/ ” here you will find the latest eclipse IDE ie is NEON so click on the NEON.
- Click on the ” Download Eclipse Packages ” link under Get Eclipse Neon .

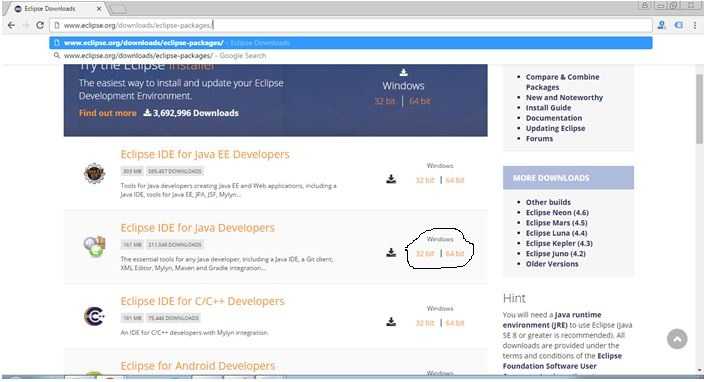
3 ) Click on the JAVA eclipse ” Eclipse IDE for Java Developers ” this version for the beginner level and you can install the ” Eclipse IDE for Java EE Developers ” this is the enterprise edition for the experts with some additional plugins.
4 ) On the left hand side of the you can select 32 bit and 64 bit version as per your operating system . If you system is of 32 bit then download the 32 bit version and if 64 then download the 64 bit version.
5 ) Now click on download 32/64 bit .
6 ) Now click on the download link and your software get starts downloading.
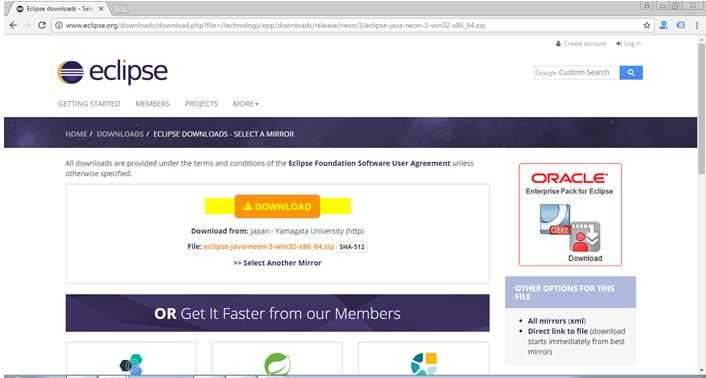
7 ) Now you will get the ZIP file downloaded at the location set at your machine.
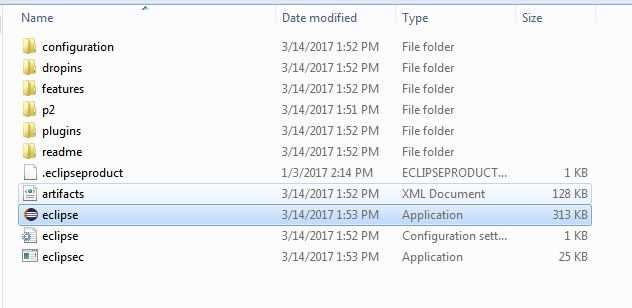
8 ) Unzip the zip file.
9 ) Now open the unzip folder and click ” eclipse.exe ” .
Note : If you don’t have the latest JDK or JRE install you will get the alert popup like below stating that JRE or JDK must be available on the machine in order to run the Eclipse or set its path .
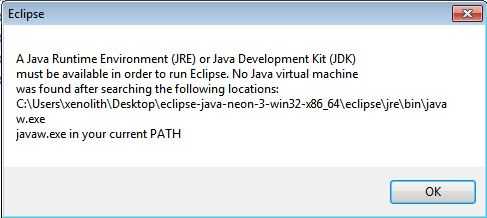
Now install the JDK ( JAVA development tool kit )
Note : If you already have the JDk or JRE installed in your machine then no need to go through this . just go to below tutorial of How to set the JAVA path variable and its value .
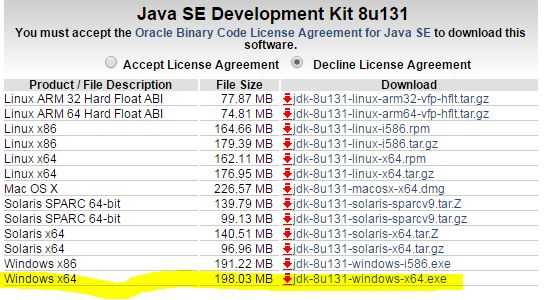
1) Go the link ” http://www.oracle.com/technetwork/java/javase/downloads/jdk8-downloads-2133151.html ” and download the version as per your operating system requirement. Like here we have downloaded the 64 bit version of JDK for windows 7 ( As our operating is 64 bit Windows 7 ).
Note : you can also install the latest JRE version as for eclipse we can run with JRE also only. JDK contains all the functionality of JRE.
Now Click on the JDK icon and starts installing. Once the JDK or JRE is installed now set the class path for the eclipse to run.
How to set the JAVA path variable in windows 7 to run the Eclipse IDE
- Go to control panel
- Select system and security
- Select Systems
- Select advance system setting in the left panel.
- A pop up box will open , then click on “Environment Variable” button on the right side bottom .
- Now under the system variables . Find the variable “Path” and click on Edit .
- Now enter the JDK bin folder path like mine is ” C:\Program Files\Java\jdk1.8.0_131\bin ” into the Variable value.
- If the variable named “Path” is not present then you can add yourself the variable name and variable value.
Note : If you have the JRE installed in your machine you can give the JRE bin path instead of JDK path.
Note : Similarly you can install the JAVA eclipse IDE in other systems and operating systems.
Now start the eclipse again and enjoy your eclipse . If you have any query please leave that in comment and subscribe with us for the latest updates.