At times, when one is working with multiple data tables in Excel, one may have to compare these in order to reach a fruitful result. In simple terms, checking and restoring the relationships between various data tables can be termed as Data Reconciliation.
Helen has the following tables in her sheet.
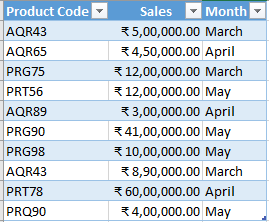
One of the tables is a list of various products and the other is their sales in various months. We will look at how the details on the summary table tally with the one on the other table.
The three steps involved in this are:
- Creating a summary query
- Making a detail query
- Creating the reconciliation query
Data Reconciliation – Creating a Summary Query
To do this, she should click on any cell in the summary table and click on the ‘From Table’ option of the ‘Get and Transform’ group in ‘Data’ menu. The following dialogue box will appear.
In this ‘Query Editor’ box, she can click on ‘Close and Load’ button and then choose the ‘Close and Load to’ option from the dropdown list. The following dialogue box will appear.
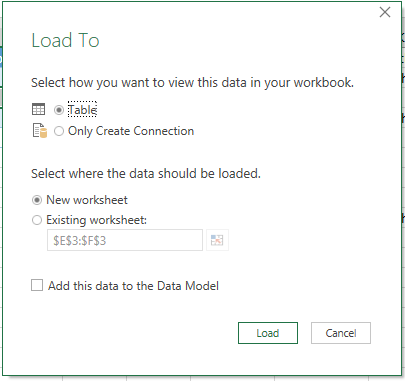 She should click on the ‘Only Create Correction’ option and then click on ‘Load’.
If she chooses ‘Table’ option, the query will return back to the cells. As she wants to be able to use this query for later queries, like the reconciliation query, she should use the ‘Only Create Connection’ option.
Data Reconciliation – Making a Detail Query
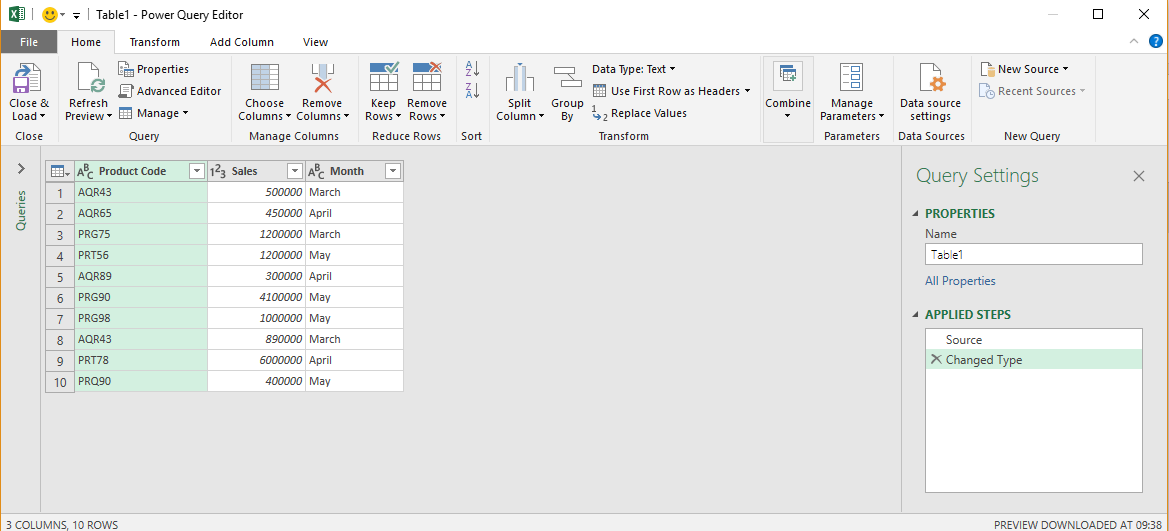
For this, she should click on the table that has the details (of which the summary was made) and click on the ‘From Table’ option in the ‘Get and Transform’ group of ‘Data’ menu. The ‘Power Query Editor’ will open again.
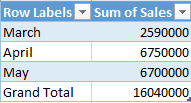
As she has to group her data month-wise to reconcile, she should right-click on the heading ‘Product Code’ and choose the ‘Group by’ option. The following dialogue box will appear.
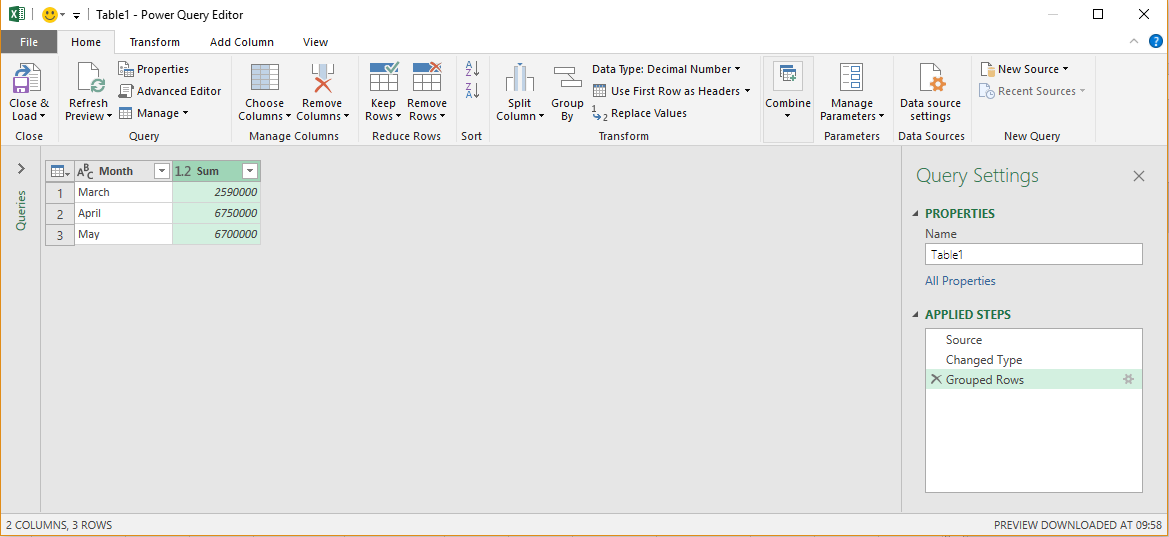
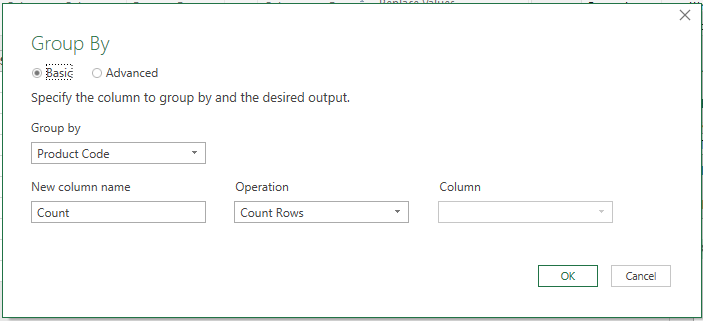 She can change ‘Group by’ to ‘Month’, the ‘Operation’ to ‘Sum’ from the dropdown list, the ‘New Column Name’ to ‘Sum’ and ‘Column’ to ‘Product Code’. This will create the query as follows.
In this ‘Query Editor’ box, she can click on ‘Close and Load’ button and then choose the ‘Close and Load to’ option from the dropdown list. The ‘Load to’ dialogue box will appear.
She should click on the ‘Only Create Correction’ option and then click on ‘Load’.
If she chooses ‘Table’ option, the query will return back to the cells. As she wants to be able to use this query for later queries, like the reconciliation query, she should use the ‘Only Create Connection’ option.
Data Reconciliation – Creating the Reconciliation Query
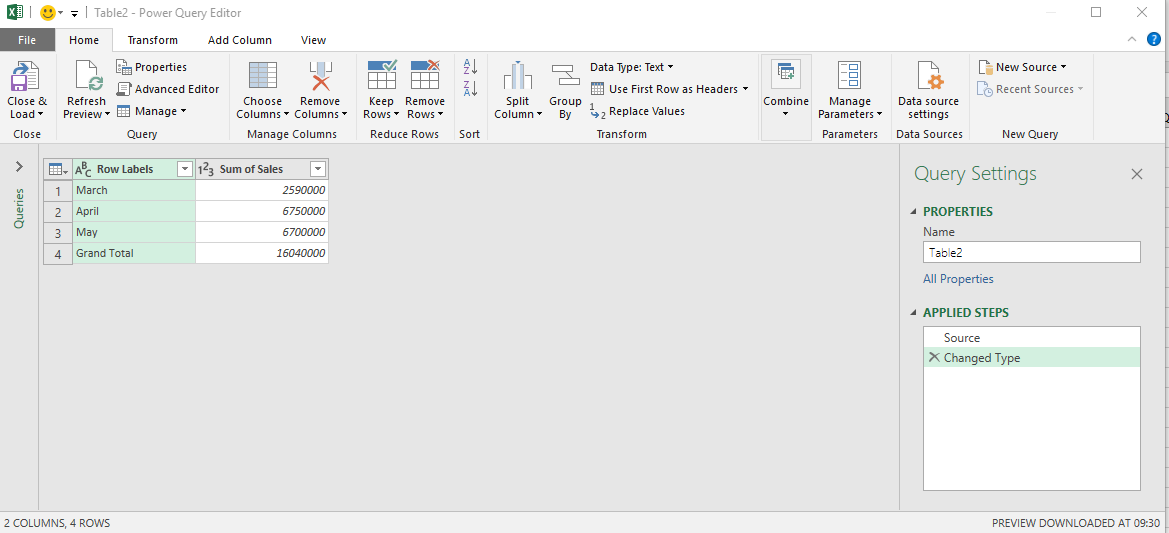
To create the reconciliation query, she should click on the ‘New Query’ option in ‘Data’ menu, then choose the ‘Combine Queries’ and ‘Merge’ options from the consequent dropdown lists.
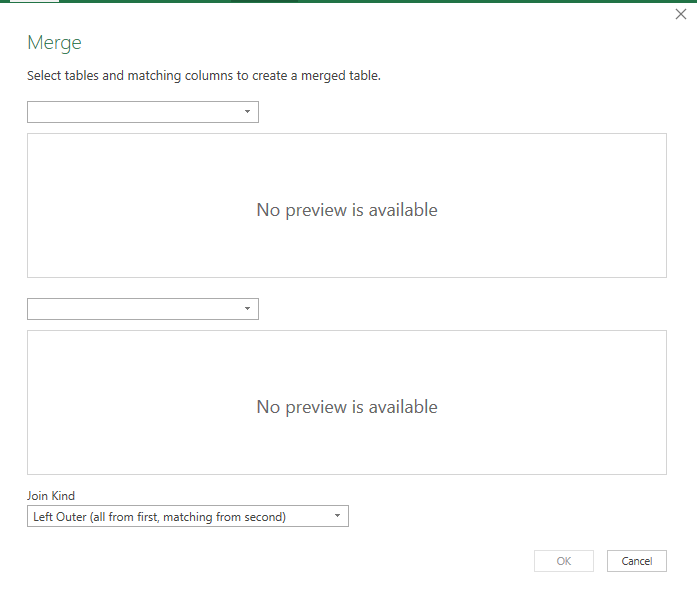 She should now select the tables in the dropdown lists and select the cells to be reconciled. She can select the ‘Join Kind’ in the dropdown list below. Click ‘Ok’ once done.
Now, she can click on the ‘Table 1’ header and select the ‘Expand’ option. She can select the columns to be added and then click ‘Ok’. In this case, the column to be added will be ‘Sum’.
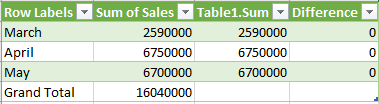
The results will display as follows.
 Now, she can insert a new column to know the difference between the two tables and to see if there has been any mistake. To do this, she should go to the ‘Add Column’ tab and then choose the ‘New Column’ option. The following dialogue box will appear.
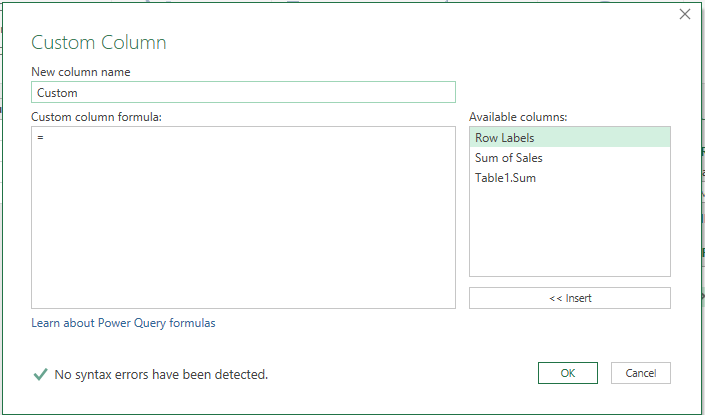 She can name the column as ‘Difference’ and use the formula
=[Table1.Sum]-[Sum of Sales]
The result will appear as follows
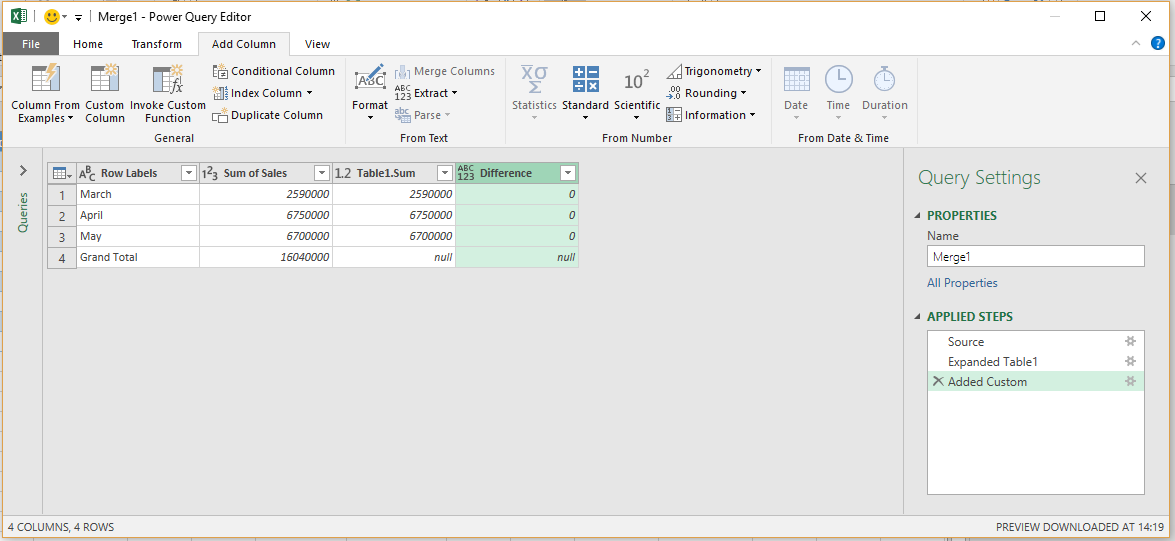
This shows that there are no errors and the summary values are the same as in the details table.
She can now give the ‘Close and Load’ command from ‘Home’ menu and the results will be reflected on the sheet as follows.