So let’s continue our project from where we left in this post: “Creating a Weather App in Django- Part1“.
So for getting whether api in your project you can add the following line inside your index function inside weather/views.py file
#units as imperial is that we will get a temperature as fahrenheit
#q is a placeholder,which is the name of city we are going to send
url = 'http://api.openweathermap.org/data/2.5/weather?q={}&units=imperial&appid=YOUR_API_KEY'
where instead of YOUR_API_KEY you can write the unique API which you got after signing into the website which we told you earlier.Without entering that key you will not be able to get the current weather,so make sure that you enter the API_KEY.
So after that you can first install requests in your pc if already not installed by typing this command in command prompt:
pip install requests
So to use that api first change the weather/views.py file as follwing:
import requests
from django.shortcuts import render

# Create your views here.
def index(request):
    #units as imperial is that we will get a temperature as fahrenheit
    #q is a placeholder,which is the name of city we are going to send
    url = 'http://api.openweathermap.org/data/2.5/weather?q={}&units=imperial&appid=YOUR_API_KEY'
    city= 'Las Vegas'

    #.json will convert the result into a json object
    # we were converting it into json because json object can be easily represented by python list or dictionary
    r = requests.get(url.format(city)).json()

    city_weather = {
        'city': city,
        'temperature': r['main']['temp'],
        'description': r['weather'][0]['description'],
        'icon': r['weather'][0]['icon'],
    }

    context = {'city_weather': city_weather}

    return render(request, 'weather/weather.html',context)
here for example we are just taking one city.Once it runs succesfully then we will create one form which will take city name from you and send it to context.
So after changing views.py file you can change weather.html template as following to use the earlier sent context inside that.
<!DOCTYPE html>
<html lang="en">

<head>
    <meta charset="UTF-8">
    <meta name="viewport" content="width=device-width, initial-scale=1.0">
    <meta http-equiv="X-UA-Compatible" content="ie=edge">
    <title>Document</title>
    <link rel="stylesheet" href="https://cdnjs.cloudflare.com/ajax/libs/bulma/0.6.2/css/bulma.css" />
</head>

<body>
    <section class="hero is-primary">
        <div class="hero-body">
            <div class="container">
                <h1 class="title">
                    What's the weather like?
                </h1>
            </div>
        </div>
    </section>
    <section class="section">
        <div class="container">
            <div class="columns">
                <div class="column is-offset-4 is-4">
                    <form method="POST">
                        <div class="field has-addons">
                            <div class="control is-expanded">
                                <input class="input" type="text" placeholder="City Name">
                            </div>
                            <div class="control">
                                <button class="button is-info">
                                    Add City
                                </button>
                            </div>
                        </div>
                    </form>
                </div>
            </div>
        </div>
    </section>
    <section class="section">
        <div class="container">
            <div class="columns">
                <div class="column is-offset-4 is-4">
                    <div class="box">
                        <article class="media">
                            <div class="media-left">
                                <figure class="image is-50x50">
                                    <img src="http://openweathermap.org/img/w/{{ city_weather.icon }}.png" alt="Image">
                                </figure>
                            </div>
                            <div class="media-content">
                                <div class="content">
                                    <p>
                                        <span class="title">{{ city_weather.city }}</span>
                                        <br>
                                        <span class="subtitle">{{ city_weather.temperature }}</span>
                                        <br>{{ city_weather.description }}
                                    </p>
                                </div>
                            </div>
                        </article>
                    </div>
                </div>
            </div>
        </div>
    </section>
    <footer class="footer">
    </footer>
</body>

</html>
So this is will print the city’s name,current temperature in fahrenheit,some description about city and icon of temperature as following:
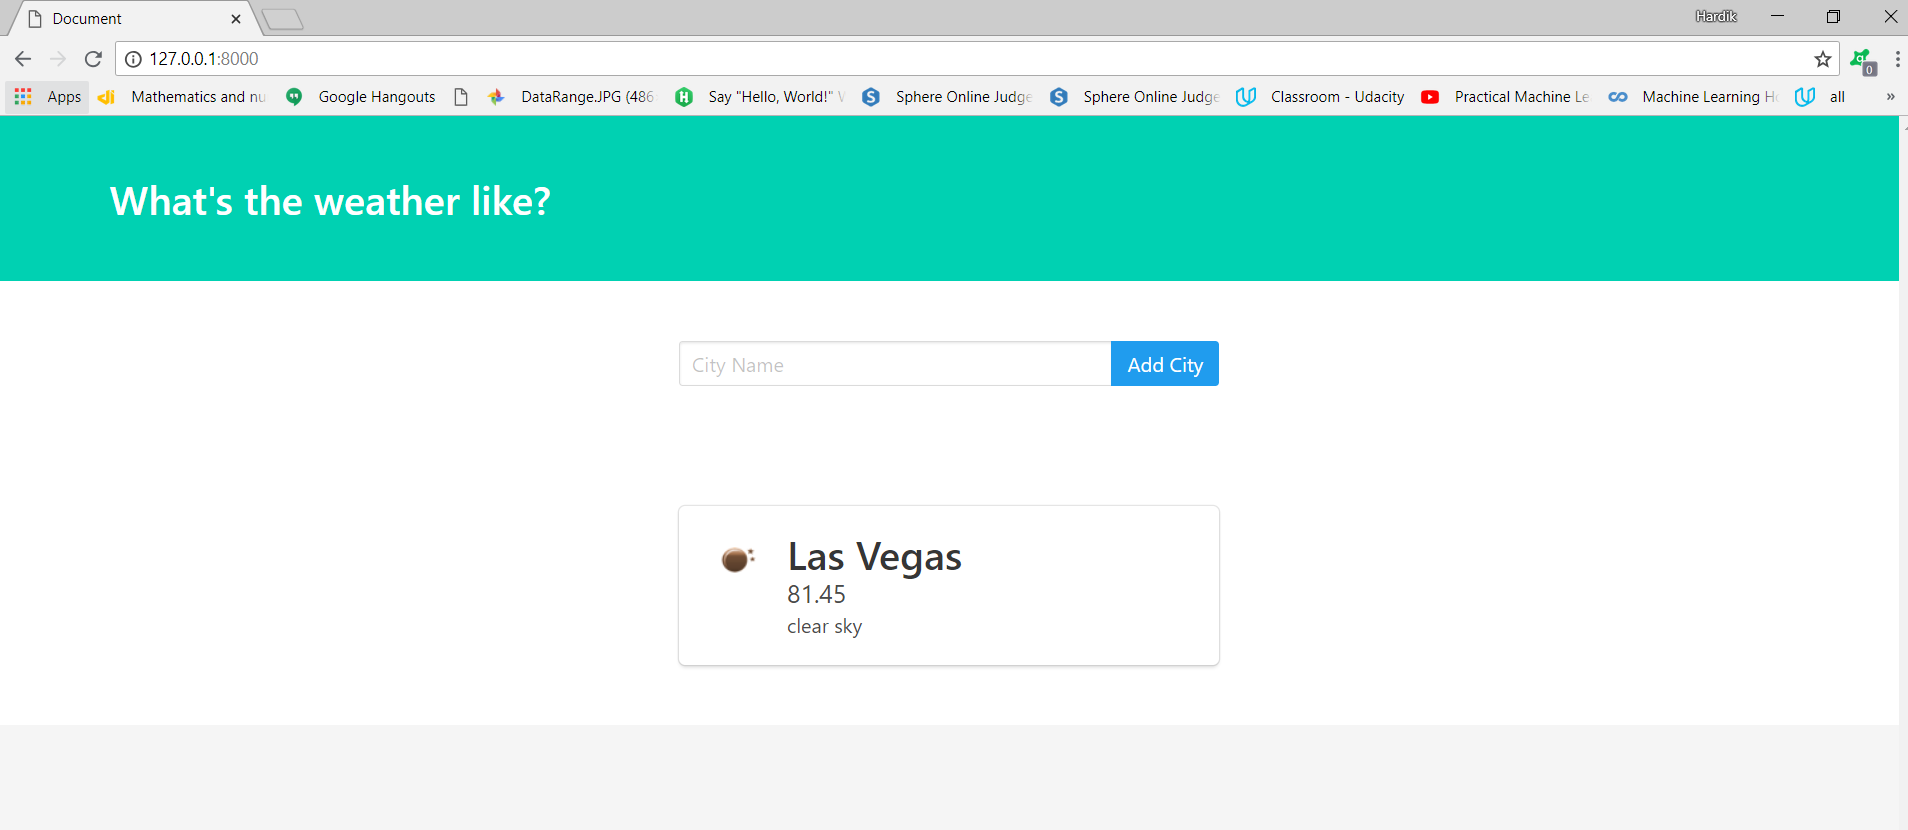
You can test this code for different cities by changing the string city inside views.py file to city you want.
So we are done with the printing one city’s weather at a time,but our goal is to print more than one city’s weather at a time.
So to do that we will create a table in the database in the next post
So this is all about using api and getting data from that api.