Tables are crucial when it comes to dealing with numbers. It is necessary for managing tables once they have been inserted. In this article, we shall look at :
- Renaming a Table
- Resizing a Table
- Removing Duplicates
- Changing the Table Back to a Range
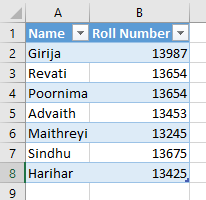
Disha is working with some data for her college and she has inserted a table for her sheet. She now needs to change a few of its settings. Here is how she can do it.
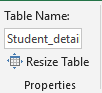
Managing Tables – Renaming a Table
To change the name of her table, Disha should select the table on her sheet that she wants renamed. The ‘Table Tools’ option will appear on the ribbon. She can now rename it by giving it a suitable name in the textbox under ‘Table Name’ in the ‘Properties’ group.
Managing Tables – Resizing a Table in Excel
Resizing a table will delete rows and columns from it. To resize the inserted table, she can click on the ‘Resize table’ option in the ‘Properties’ group of the ‘Table Tools’ menu. The following dialogue box will appear.
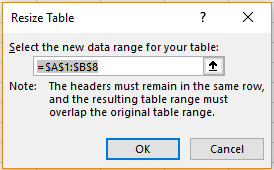
She can now enter the range of cells that she wants to include in her renewed table in the ‘Select the new data range for your table:’ textbox or select this manually by clicking on the arrow. She should click ‘OK’ once done.
Managing Tables – Removing Duplicates in Excel
To remove duplicate values in a table, select a table and click on the ‘Table Tools – Design’ menu on the ribbon. Now, click on the ‘Remove Duplicates’ option in the ‘Tools’ group. The following dialogue box will appear.
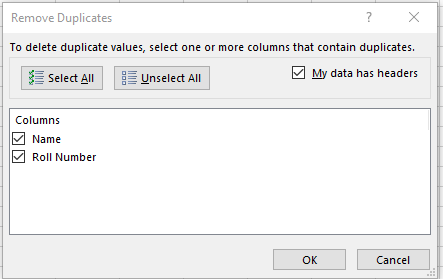 She can choose the rows or columns in which she wants to check for duplicates in the box. If she clicks on the ‘Select All’ option, all the displayed items will be selected. The same can be reversed using the ‘Unselect All’ option. If her table has headers, the ‘My data has headers’ option will remain selected and not, if otherwise.
She should click on ‘OK’ once she is done.
In case any duplicate values are found, the following dialogue box will appear.
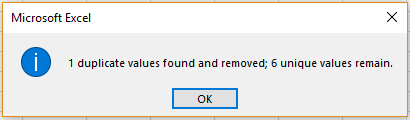 She can click on ‘OK’.
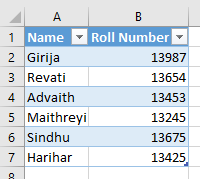
The duplicate value will now be removed.
Managing Tables – Changing the Table Back to a Range
If Disha changes her mind later on and decides that she wants to delete the table and simply have it as a group of cells, she can do this by doing the following steps.
She should click on the table and select the ‘Convert to Range’ option in the ‘Tools’ group of ‘Table Tools – Design’. The following dialogue box will appear.
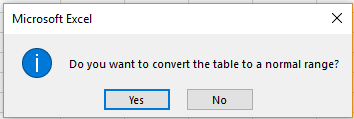 She should choose the ‘Yes’ option.
Her table would now be converted back to a range of cells.