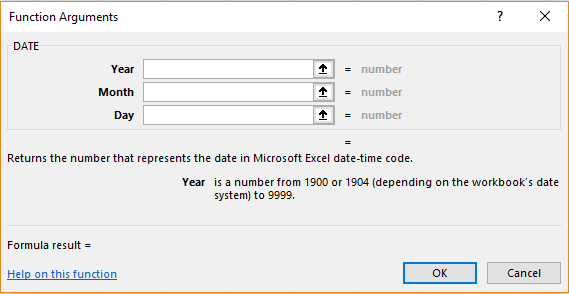
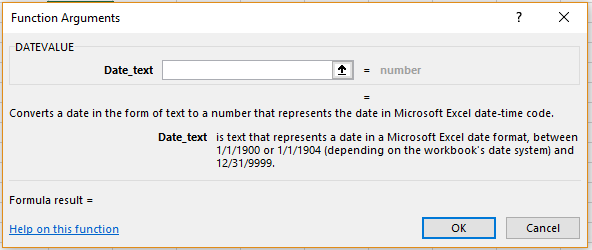
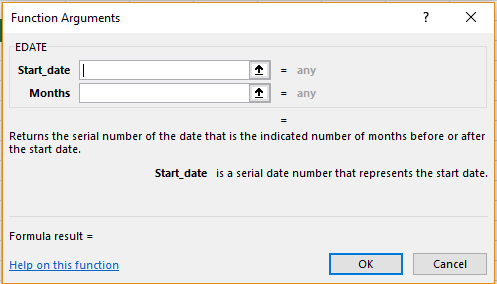
DATE, DATEVALUE and EDATE are basic ‘Date & Time Function’ in Excel. This module will look at the differences between the three and where each one of these can be used.
Date & Time Function – DATE
Meryl has the following spreadsheet in which she wants to insert the birthdates for her classmates. She can use the DATE function to enter these in the specific format.
Syntax:
DATE(year,month,day)
Here, ‘year’ refers to the particular year the date to be entered belongs to, ‘month’ to the particular month and ‘day’ to the corresponding date.
Anu’s birthday is on 10th August 1998. Meryl can use the following formula
=DATE(1998,8,10)
The result will appear as follows once she enters the value for all the birthdates.
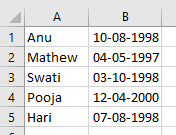 It is to be noted that ’00’ for year will automatically get updated as ‘2000’ instead of, say, 1900 or 1800.
Alternatively, this function may also be inserted by going to the ‘DATE’ option in the ‘Date & Time’ option in ‘Function Library’ and entering the suitable cell references.
Date & Time Function – DATEVALUE
This function can be used to convert the dates into Excel date forms. This will display a serial number in the place of the date which corresponds to the date entered in the Excel data files.
Syntax:
DATEVALUE(date_text)
Here, ‘date_text’ corresponds to the date to be converted to an Excel Date.
The formula to be used if Meryl wants to convert the dates in her sheet to this form is
=DATEVALUE(“10/08/98”)
and enter the same for each value. The results will appear as follows.
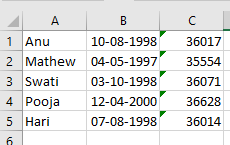 In case she gets a #VALUE error while doing this, it means that the format entered is not suitable for dates.
Alternatively, this function may also be inserted by going to the ‘DATEVALUE’ option in the ‘Date & Time’ option in ‘Function Library’ and entering the suitable cell reference.
Date & Time Function – EDATE
This is a very helpful function to denote dates as referential of other dates. That is, this function gives the date as relative to another date to enter it.
Suppose Meryl wants to calculate the birthdates of her friends in relation to her own birthday which is on 19th July 1999, she can use this option.
Syntax:
EDATE(start_date,months)
Here ‘start_date’ refers to cell reference that has the date which must be used to refer to the other dates and ‘months’ indicates the cell reference after or before which the date occurs.
To use this function, Meryl should first convert her data as follows
 She can now use the following formula and then drag it to the rest of the cells.
=EDATE($B$7,B8)
The result will appear as follows.
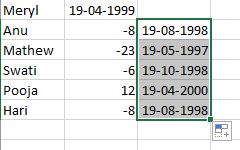 One problem, however, with this function is that it generates the same date for all the results.
It is to be noted that for this function, a negative sign is used to indicate dates that have occurred in months previous to the starting date.
Alternatively, this function may also be inserted by going to the ‘EDATE’ option in the ‘Date & Time’ option in ‘Function Library’ and entering the suitable cell references.

