In this tutorial we will learn how to capture the screenshot in selenium with web driver.
Lets understand first Why do we need screen shot ?
1) Screenshots are required to check the control flow of the test scripts in more detail.
2) Screenshots are required when test case fails to know why the test case failed.
3) While working with frameworks screen shots are required to capture in the reports for clear understanding.
How to capture screenshot in selenium with Java
Steps to capture screen shot
1) Create TakesScreenshot “ts” object and convert the webdriver into TakesScreenshot object.
2) call getScreenshotAs with “ts” and set output type as file as in program.
3) Create folder screen shot in project.
4) copy the screenshot in the source folder with copyFile utility and pass the relative path.
5) Take any extension of image ( in this program .png is used ).
package com.SeleniumBasics;

import java.io.File;
import java.io.IOException;
import org.apache.commons.io.FileUtils;
import org.openqa.selenium.OutputType;
import org.openqa.selenium.TakesScreenshot;
import org.openqa.selenium.WebDriver;
import org.openqa.selenium.firefox.FirefoxDriver;
import org.testng.annotations.Test;

public class Get_Screen_Shots {

	@Test
	public void TestCase1() throws InterruptedException
	{
		// Open Firefox
				System.setProperty("webdriver.gecko.driver", "geckodriver.exe");
				WebDriver driver=new FirefoxDriver();
				// Maximize the window
				driver.manage().window().maximize();
				// open the google
				driver.get("https://www.google.co.in/");
				// call get screen shot method and pass the driver and testcase name
				get_screen_shot(driver,"Testcase1");
				Thread.sleep(10);
				driver.quit();

	}
		// this function can be used to take screen shot
		// by passing the driver as a parameter
		public void get_screen_shot(WebDriver driver, String screenshot_name)
		{

		// Convert webdriver object to Takescreenshot
		TakesScreenshot ts = ((TakesScreenshot)driver);
		// call get screen shot method and pass the parameter as file
		File src= ts.getScreenshotAs(OutputType.FILE);
		try {
		 // now copy the  screenshot to desired location using copyFile
		// we used relative path for screen shot
		FileUtils.copyFile(src, new File(".\\ScreenShots\\" + screenshot_name + ".png"));
		}

		catch (IOException e)
		 {

			System.out.println(e.getMessage());

		 }
		}
}
Note : Always take the relative path , don’t take the hard coded path as when we run the script in another machine then we need to change the path every time. Here to capture the screen shot we have taken the relative path.
Output :
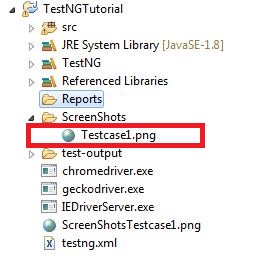
Screen shot is captured in “Screen Shots” folder with name “Testcase1.png”.
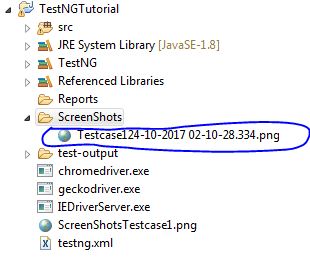
Now if you have noticed whenever you run the above script the screen shot will be saved with same name every time , hence it will override the previous screen shot. So to avoid this we can add the time stamp in screen shot name as shown in below program. In live projects we follow the screen shot name with date time stamp.
Java Program
package com.SeleniumBasics;

import java.io.File;
import java.io.IOException;
import java.text.DateFormat;
import java.text.SimpleDateFormat;
import java.util.Date;

import org.apache.commons.io.FileUtils;
import org.openqa.selenium.OutputType;
import org.openqa.selenium.TakesScreenshot;
import org.openqa.selenium.WebDriver;
import org.openqa.selenium.firefox.FirefoxDriver;
import org.testng.annotations.Test;

public class Get_Screen_Shots {

	@Test
	public void TestCase1() throws InterruptedException
	{
		// Open Firefox
				System.setProperty("webdriver.gecko.driver", "geckodriver.exe");
				WebDriver driver=new FirefoxDriver();
				// Maximize the window
				driver.manage().window().maximize();
				// open the google
				driver.get("https://www.google.co.in/");
				// call get screen shot method and pass the driver and testcase name
				get_screen_shot(driver,"Testcase1");
				Thread.sleep(10);
				driver.quit();

	}
		// this function can be used to take screen shot
		// by passing the driver as a parameter
		public void get_screen_shot(WebDriver driver, String screenshot_name)
		{

		// Convert webdriver object to Takescreenshot
		TakesScreenshot ts = ((TakesScreenshot)driver);
		// call get screen shot method and pass the parameter as file
		File src= ts.getScreenshotAs(OutputType.FILE);
		// date time stamp for unique screen shot name in milliseconds
		DateFormat dateFormat = new SimpleDateFormat("dd-mm-yyyy hh-mm-ss.SSS");
        Date date = new Date();

		try {
		 // now copy the  screenshot to desired location using copyFile
		// we used relative path for screen shot
		FileUtils.copyFile(src, new File(".\\ScreenShots\\" + screenshot_name + dateFormat.format(date) + ".png"));
		}

		catch (IOException e)
		 {

			System.out.println(e.getMessage());

		 }
		}
}
Output – the screen shot name is now below
This is all about the Capture screen shot in selenium . Please go through the code thoroughly as it is one of the most frequent interview question of selenium.