Preeti is making an excel sheet for her work and she wants to use different colours and fonts for different kinds of cells. She discovers that the ‘Cell Styles’ option in the ‘Home’ menu will help her do this. How?
The ‘Cell Styles’ option in the ‘Styles’ group of the ‘Home’ menu gives one a varied range of cell style options to choose from. The dropdown list looks as follows.
 The styles are grouped under these headings:
-Good, Bad and Neutral
-Data and Model
-Titles and Headings
-Themed Cell Styles
-Number Format
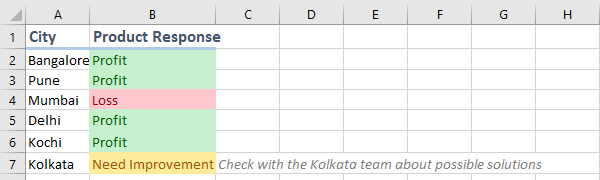
Good, Bad and Neutral
This headings has four colours under it- white, light red, light green and light yellow.
‘Bad’ or light red shows that a particular cell has negative result.
‘Good’ or light green shows that a particular cell has positive result.
‘Neutral’ or light yellow shows that a particular cell has neutral result.

Data and Model
This heading has various options which can be used while using data and calculations.
The various options available under this heading are Calculation, Check Cell, Explanatory, Input, Linked Cell, Note, Output and Warning.
 Titles and Headings
These cells styles can be used to emphasize the headings of the tables.
Themed Cell Styles
This shows you a range of colours, and the various shades of the same. The user can use how dark a cell should be by appropriately choosing the accent percentage.

Number Format
This option has the various cell styles suitable for numerical data.
Comma – Inserts comma at the thousands, lakhs, etc. places and adds decimal points and two zeroes after the number.
Comma [O] – Inserts commas but no decimal points.
Currency – Inserts currency symbol and adds decimal points and two zeroes after the number.
Currency [O] – Inserts currency symbol but no decimal points.
Percentage – Turns the data into the cell as a percentage value.
New Cell Style
This option lets you make a new cell style for yourself, according to your needs. The following dialogue box appears.
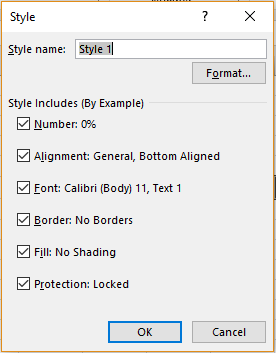
The user can see what the new cell style includes in a list as shown. She can format one for herself by going to the ‘Format’ option. The following dialogue box will appear.
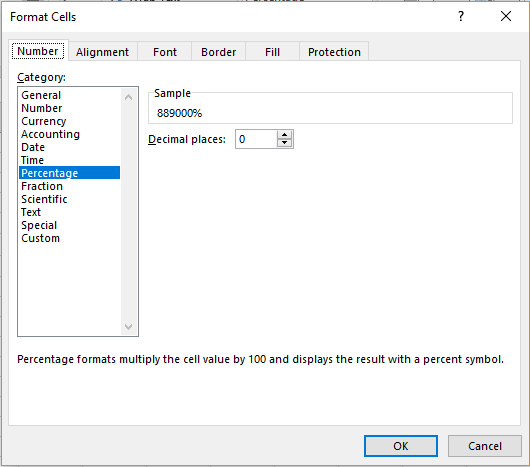
The user can now select the particulars for each of the headings given for the new cell style, which are Number, Alignment, Font, Border, Fill and Protection. Click ‘Ok’ until done.
Merge Cell Styles
The user can merge cell styles from other workbooks using this option. The following dialogue box will appear.
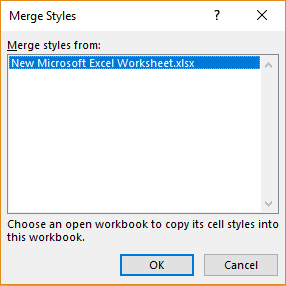 Choose the workbook from which you want to merge style and then click ‘OK’.