What is Auto Filter?
Auto Filter is an option available in Excel that makes it easier for a user to find, show or hide the specific data he/she wants. Once the data has been filtered, one can edit it however one wants and print it directly. By filtering data, the user can find the information he/she is looking for much easier. In this module, we will look at the following points with regard to Auto Filter:
- How to Apply Auto Filter
- Filter Data with Specific Criteria
- Clearing These Set Conditions
- Removing AutoFilter
How to Apply Auto Filter?
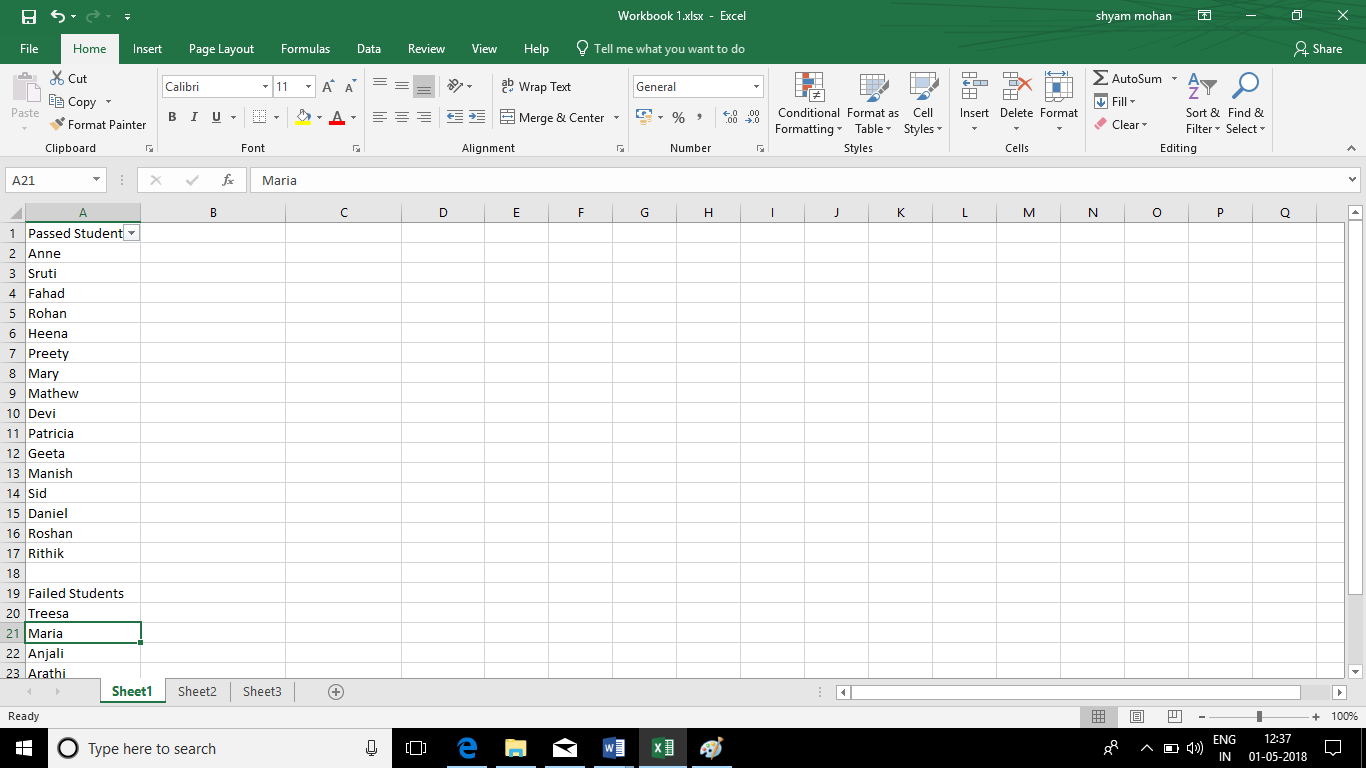
Rita is the class monitor of 12th B. Her class teacher has given her the following spreadsheet and asked her to separate the details of students who have failed. Auto Filter is an easy way to do this.
These are the steps she should follow.
Open her Microsoft Excel Worksheet. Select the range of cells that she wants to filter. Click on the ‘Home’ menu.
Now, click on the ‘Sort and Filter’ dropdown list from the ‘Editing’ group in the ribbon. A dropdown list as shown below will appear.
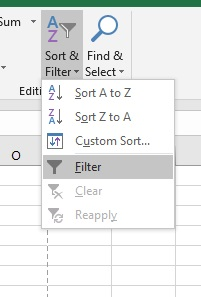
Click on the ‘Filter’ option.
Her cells will have a small dropdown arrow beside it.
Filter Data with Specific Criteria
As her teacher has given her specific criteria, Rita can use these to specify her filter and make it easier.
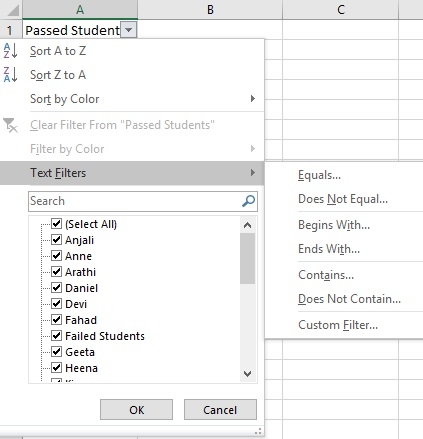
She should click on the small dropdown arrow that appears after you have applied AutoFilter on the range. A dropdown list showing you details about the various data will be given with small checkboxes beside them.
She can uncheck the checkboxes against the names of failed students and click ‘Ok’ once she is done.
In case her teacher had given her marks of each student as well and asked her to separate out the data based on this, she could have used these options. She can add other criteria by going to the ‘Text Filters’ option in the dropdown list produced by the arrow. The Text Filters available are:
Equals: Equal to the value specified.
Does Not Equal: Not equal to the value specified
Begins With: Beginning with a particular character
Ends with: Data ending with a particular character
Contains: Data containing specific characters
Does not contain: Data that does not contain the specific character
Custom Filter: To create a filter of your choice
She can choose
Clearing the Set Conditions
Once she is done, Rita may want to remove the set conditions to return the sheet. She can follow these steps.
Select the range of cells that she wants to filter and click on the ‘Home’ menu.
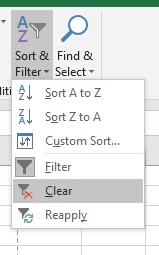
Now, click on the ‘Sort and Filter’ dropdown list from the ‘Editing’ group in the ribbon. A dropdown list will appear. Click on ‘Clear’ button.
All the conditions that she had applied would be cleared.
Removing Auto Filter
By following the given steps, she can remove AutoFilter to return the sheet as it was.
Select the range of cells that she wants to remove the filter of. Click on the ‘Home’ menu.
Now, click on the ‘Sort and Filter’ dropdown list from the ‘Editing’ group in the ribbon. A dropdown list will appear.
Click on ‘Filter’. The dropdown arrows present in cells before will disappear.